One of the most popular restaurants in Boston for everyday fare is Joanne Chang’s Flour Bakery and Café. Sited in four different geographical locations around the city – Washington Street in the South End, the Back Bay, Cambridge near MIT and Fort Point near the Seaport District – this restaurant has lines out the door at lunchtime. People flock to Flour for their unparalleled BLT sandwiches on homemade bread, hot soups, salads and daily specials like chicken pot pie. And of course there are Flour’s scrumptious cookies, cupcakes and wide array of baked goods.
Chang was on-island this summer to host a brunch at Straight Wharf Restaurant, owned by her good friends Amanda Lydon and Gabriel Frasca, featuring recipes from her new cookbook “flour, too”, and we got to meet her and savor some of her delicious food, including an incredible rendition of fried chicken. (Yes, it’s in the book!). The chef and author is as delightful and charming in person as the food she prepares in her restaurants.
One of the things I love about Chang’s cookbooks, is not just the recipes, but the advice she gives in the beginning chapters on what to look for in pantry and refrigerator staples, where to get them and how to store them. Her first book, “flour,” also talks a lot about the science of baking, the importance of following procedures and timing and the temperature at which ingredients should be before mixing and during baking. Did you know eggs should be at room temperature?
A quick way to get them there is by immersion in warm water for 10 minutes. I would definitely recommend buying both books, as I have, and reading the chapters preceding the recipe section. Your baking will be all the better for the time invested.
One thing to keep in mind when perusing this volume is that Chang is a Harvard grad who majored in math and did a stint in the business world before succumbing to her true passion – baking. The analytical mind that got her through one of the top universities in the country comes into play and meshes with her love of cooking, plus the experience she garnered working at some of Boston’s top restaurants before branching out on her own to produce some pretty fabulous food.
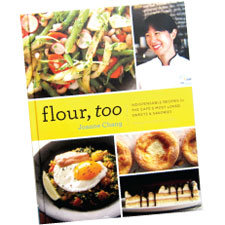
Recipes for many of Chang’s most oftrequested bakery items which focused on breakfast pastries and desserts were chronicled in “flour,” released in 2011. Now Chang has come out with a sequel, “flour too,” which puts the focus squarely on savory items and more main-dish options, perfect for the home cook who is dying to get back into the kitchen now that cool weather is upon us.
The recipe I was most excited to find in this new cookbook is one for Mama Chang’s Hot and Sour Soup. In addition to the Flour restaurant, Chang and her husband, Christopher Myers, also have an upscale Taiwanese diner, Myers + Chang, just down the road from their Washington Street bakery and café, Flour. M+C is famous for this brightly-flavored soup that hits all the topnotes one aches for in this popular dish, with none of the gloppiness often found in Chinese-restaurant soups. I almost always order a bowl of this for lunch when I’m in the city and make a point of getting one order to go.
Chang’s recipe is a simple one, using ground pork integrated into the chicken broth flavored with ginger, sesame oil, soy sauce, scallions, tofu and Sriracha sauce for the hot, and vinegar for the sour taste.
Serve the soup with some of Chang’s scallion pancakes with dipping sauce and you have a savory supper that family and friends will be talking about for weeks.
Another warming dish for winter nights when winds begin to howl out of the
northeast is Corey’s Homemade Chicken Pot Pie. Chang uses a pâte brisée for the crust and a filling of chicken, celery, carrots, potatoes and peas, though you could certainly substitute some of your favorite veggies for those listed here. Cubed butternut squash and parsnips could easily be switched for the carrots and potatoes, or you could use sweet potatoes instead of russets. I like this dish, made early in the fall, with Bartlett’s Farm carrots, which are smaller and sweeter than what you’ll find in the grocery store once winter sets in and the fields lie fallow.
This is a dish that can be made on the weekend, when you have time and the desire to cook, and be frozen to serve midweek.
I included a recipe for Chang’s Ham and Cheddar Hot Pockets, little squares of pastry stuffed with premium Black Forest ham and good Vermont cheddar – I like Cabot extra-sharp or Grafton cheddar – that pair with any of the soups in Chang’s book but go especially well with the Eggplant Parmesan Soup (sounds weird, but my son Kevin made it and it is yummy and tastes just like eggplant parm in a bowl!). I’m also fond of the Sweet Potato with Thai Curry and Coconut, which you could serve with the Scallion Pancakes for an Asian-themed light supper.
“flour, too” features dozens of recipes for meals which are hearty, such as Boneless Beef Short Ribs and Parmesan Polenta, Mushroom and Leek Lasagna with Creamy Béchamel, and Buttermilk Fried Chicken, to much lighter fare. A dozen soups and as many sandwiches are featured and breakfast items such as Spiced Banana Pancakes, Classic Apple Turnovers and Twice-Baked Brioche.
While Chang’s first cookbook, “flour,” is heavy on pastries and desserts, she includes a dozen sweet endings in “flour, too.” Lemon-Ginger Mousse, Boston Cream Pie and Bittersweet Chocolate-Espresso Terrine are three I’ll be trying before Thanksgiving rolls around. ///
Marianne R. Stanton is editor and publisher of Nantucket Today and The Inquirer and Mirror, Nantucket’s newspaper since 1821. She writes frequently about food and travel for both publications.
HOMEMADE CHICKEN POT PIE
This one-dish meal with homemade chicken stock, fresh herbs and vegetables and freshly-cooked chicken is the perfect do-ahead dish for busy lives. Make it on the weekend, and freeze it and bake it later in the week for a wholesome and satisfying weeknight dinner.
FOR THE PÂTE BRISÉE (Crust) 13⁄4 cups all-purpose flour
1 tablespoon granulated sugar 1 teaspoon kosher salt
1 cup ( 2 sticks) cold, unsalted butter, cut into 12 pieces 2 egg yolks, using large eggs
3 tablespoons cold whole milk
FILLING
2 tablespoons unsalted butter
1 medium onion, cut into 1⁄2-inch pieces
1 large carrot, peeled and thinly sliced crosswise
1 celery stalk, thinly sliced
1 small russet potato, unpeeled and cut into 1⁄2-inch pieces
1 pound boneless, skinless chicken breasts, cut into 1to 2-inch pieces
5 tablespoons all-purpose flour
11⁄2 cups chicken stock
1 cup fresh or frozen English green peas 2 teaspoons chopped, fresh thyme
11⁄2 teaspoons kosher salt
1⁄2 teaspoon freshly-ground pepper
2 tablespoons heavy cream
1large egg, beaten
To Make the Pastry Crust (Pâte Brisée):
1. Using a stand mixer or handheld mixer, mix together the flour, sugar and salt on low speed for 10-15 seconds. Scatter the cold butter over the flour mixture and beat on low speed for 1-11⁄2 minutes or until the flour is no longer bright white and holds together when you clump it, and lumps of butter the size of pecans are visible throughout.
2. In a small bowl, beat the egg yolks and whisk in the milk. Add the yolk-milk mixture all at once to the flour-butter mixture and beat on low speed for 20-30 seconds, or JUST until the mixture barely comes together. It will look really shaggy and more like a mess than a dough.
3. Dump the dough onto a clean, dry work surface and gather it into a tight mound. Using the palm of your hand, smear the dough, starting at the top of the mound and sliding your palm down the sides of the mound along the work surface, until most of the butter chunks are smeared into the dough and the whole thing comes together. Wrap the dough tightly in plastic wrap and press down to make a flattened disk. Refrigerate for at least one hour before using. The dough can be stored in the refrigerator for up to four days or in the freezer for up to four weeks. (Wrap in a second layer of plastic wrap if freezing dough). To thaw frozen dough, transfer to refrigerator for 24 hours before using and allow it to thaw in the fridge for one day before using.
4. Divide dough into two pieces, one twice as large as the other. The larger will be the bottom crust, the smaller the top. On a well-floured work surface, roll out the large portion of the dough into a circle about 12 inches in diameter and
1⁄8-inch thick. Roll the dough circle so it wraps around the rolling pin, then unfurl it on top of the pie pan and press the dough down into the bottom and sides of the pan, leaving a 1⁄4-inch lip extending beyond the pan rim to allow for shrinkage while baking. Refrigerate the pie shell for at least 30 minutes. After initial freezing, the pie shell can be wrapped tightly in double layers of plastic wrap and refrigerated for up to one day or kept in the freezer for up to two weeks. The frozen pie shell can be baked directly from the freezer.
5. Preheat the oven to 350° F and place a rack in the center of the oven.
6. Line a chilled pie shell with parchment paper, fill it with pie weights, and blind bake for 30-35 minutes, or until the entire pie shell is light brown. Transfer pan to wire rack, remove parchment and pie weights and let shell cool completely. Leave oven on.
To Make the Filling and Bake the Pie:
1. In a large saucepan heat the butter over medium-high heat until it foams. Add the chopped onion and cook for two to three minutes or until it softens a bit.
2. Add the potato, carrot and celery and sauté, stirring, for four to five minutes or until the vegetables start to soften.
3. Add the chicken and continue to cook over medium-high heat, stirring with a wooden spoon for another two to three minutes or until the chicken pieces start to look opaque. Stir in the flour, mixing to coat all the meat and vegetables, cooking for another two to three minutes longer. By this time the filling will start to look sludgy and a brown film will begin to form on the bottom of the pan.
4. Add the stock slowly and bring to a simmer, stirring well.
5. Add the peas, thyme, salt, pepper and cream, stirring well. Scrape the bottom of the pan to loosen any brown bits clinging to the bottom and incorporate them into the filling. Simmer for about five minutes, or until filling thickens and reaches desired consistency.
6. Remove from the heat and spoon filling into pre-baked pie shell.
7. Roll out the remaining pie dough in a circle about ten inches in diameter and 1⁄8-inch thick. Wrap the dough circle around the rolling pin and unfurl it over the filled pie shell, letting the edge of the round overhang the shell by 1⁄4 to 1⁄2 inch. You will trim off this excess once the pie is baked. Note, you do not crimp top and bottom crusts together, since the bottom crust is prebaked. Using a pastry brush, brush the top crust evenly with the beaten egg. Poke a hole in the center of the pie to allow steam to escape. NOTE: At this point the filled pie can be wrapped tightly with a double layer of plastic wrap and frozen. When you want to bake it, unwrap the pie, place on a rimmed cookie sheet to catch any spilled juice, and put the unwrapped pie in a preheated oven. You will need to add 20-25 minutes to the baking time, and tent a piece of aluminim foil over the pie if the crust starts to brown too quickly before the inside of the pie is baked.
8. Place the filled pie on a rimmed baking sheet and place on a rack in the center of the preheated oven. Bake for about 30 minutes or until the entire top crust is a golden brown. Transfer to a wire rack and let cool for about 15 minute before serving. With a sharp paring knife, trim away any excess crust from the edge before serving.
MAMA CHANG’S HOT AND SOUR SOUP
Here are all the bright and peppery flavors of the hot-and-sour soup you get at a good Chinese restaurant, with none of the glop, Chang says. Whenever I am in Boston, I make a point to stop at Joanne’s restaurant Myers + Chang on Washington Street and almost always order a bowl of this, and one container to go – it’s that good!
2 tablespoons vegetable oil
1 garlic clove, smashed and minced
1 tablespoon peeled and minced ginger
4 scallions, white and green parts, minced, plus 2 tablespoons chopped for garnish
8 ounces ground pork 4 cups chicken stock
1pound block soft or firm tofu (not silken and not extra firm) cut in 1⁄2-inch cubes
4 or 5 medium button mushrooms, wiped clean and thinly sliced
1 teaspoon granulated sugar
2⁄3 cup rice vinegar
3 tablespoons soy sauce
1 teaspoon freshly-ground black pepper 1 tablespoon sesame oil
1 tablespoon Sriracha sauce
2 large eggs
White pepper for garnish
1. In a saucepan heat the vegetable oil over medium-high
heat until hot. Add the garlic, ginger, scallions and ground pork and cook, stirring occasionally, for about one minute. Break up the pork into smaller pieces, but don’t worry about breaking it down completely. Add the stock and bring to a simmer.
2. Add the tofu, mushrooms, sugar, vinegar, soy sauce, black pepper, sesame oil and Sriracha sauce and bring the soup to a simmer over medium-high heat. At this point taste the soup, and if you want it hotter, add more Sriracha sauce. If you want it more sour, add a bit more vinegar.
3. In a small bowl, whisk the eggs until blended. With the soup at a steady simmer, slowly whisk in eggs, so they form strands. Bring the soup back to a simmer. Divide the soup among four bowls and garnish each with a little sesame oil, scallion and white pepper. Serve immediately. The soup can be stored in an airtight container in the refrigerator for up to three days.
SCALLION PANCAKE
Joanne Chang grew up eating scallion pancakes “In every shape and form.” Here she gives us a recipe for this savory treat that would be a nice prelude to an Asian-themed winter dinner party, or served with Mama Chang’s Hot and Sour Soup. This recipe makes three large pancakes that are then cut into wedges and served with a soy dipping sauce.
FOR THE SCALLION PANCAKE
9 scallions, white and green parts, minced 1⁄4 cup sesame oil
11⁄4 teaspoon kosher salt
1⁄2 batch Flour Focaccia dough
About 11⁄2 cups vegetable oil, for frying
SOY DIPPING SAUCE
3 tablespoons soy sauce
1⁄2 teaspoon Sriracha sauce
1⁄2 teaspoon sesame oil
1 tablespoon peeled and finely-minced fresh ginger 1 teaspoon rice-wine vinegar
1 tablespoon granulated sugar
1 scallion, white and green parts, minced
Equipment Needed: Rimmed baking sheet, rolling pin
1. In a small bowl, mix together the scallions, sesame oil and salt.
2. Cut the dough into thirds. On a well-floured work surface, roll out one portion of the focaccia dough into a thin 5-by-10inch rectangle. Repeat with the remaining dough portions.
3. Spread the scallions evenly over the dough rectangles, leaving a 1⁄2-inch border, uncovered, on all sides.
4. Starting at the long side, roll up each rectangle jelly-roll style and pinch the seam with your fingers to seal. Spiral each cylinder into a tight coil and tuck the ends under the coil. Place in a warm area of the kitchen, free from drafts, cover loosely with plastic wrap, and rest for about two hours to allow the dough to proof and relax. NOTE: At this point the dough can be stored in an airtight container in the refrigerator overnight, or in the freezer up to one week. Thaw in the refrigerator overnight before using, if you freeze the dough.
5. Line the baking sheet with a double layer of paper towels and set aside.
6. On a generously-floured work surface, press each coil into a flat circle, deflating any air pockets and squishing the scallions gently into the dough.
7. With the rolling pin, slowly and carefully roll out each flattened circle into a 10-inch round. Flour the dough and work surface as needed to prevent the dough from sticking. (It’s OK if some of the scallion mixture comes out.) As you finish rolling out each round set it aside.
8. In a large skillet, heat the vegetable oil over medium-high heat until it is shimmering.
9. WHILE THE OIL IS HEATING, MAKE THE DIPPING SAUCE: In a small bowl, whisk together the soy sauce, Sriracha sauce, sesame oil, ginger, vinegar, sugar and scallion until the sugar has dissolved. Set aside. NOTE: The sauce can be made up to one week in advance and stored in the refrigerator in an airtight container.
10. FRYING THE PANCAKES: To check if the oil is ready, sprinkle a bit of flour into the skillet. If its sizzles on contact, the oil is ready. Carefully add one pancake to the hot oil and fry, turning only once, for one to two minutes per side, or until golden. Transfer the pancakes to the prepared baking sheet. Repeat with the remaining pancakes, always allowing the oil to return to temperature before adding the next one.
Cut the pancakes into quarters, arrange on a platter, and serve hot with dipping sauce.
FLOUR FOCACCIA
This recipe makes about 21⁄4 pounds dough, enough for a large sandwich loaf, ten pockets, six scallion pancakes or two large pizzas.
1 teaspoon active dry yeast
3 cups all-purpose flour
1 cup bread flour
5 teaspoons granulated sugar 2 teaspoons kosher salt
1⁄2 cup olive oil
Small handful corn meal for sprinkling on the baking sheet
Special Equipment: stand mixer with dough-hook attachment makes it a snap to make the dough, but it can be made by hand. You’ll also need a rimmed baking sheet.
1. In the bowl of a stand mixer, combine 11⁄2 cups warm water and the yeast and let sit for 20-30 seconds to allow the yeast to dissolve and activate. Dump the all-purpose flour, bread flour, sugar and salt into the water. Carefully turn the mixture on to low speed and mix for about ten seconds. When the dough is still shaggy-looking, drizzle in the olive oil, aiming it along the side of the bowl to keep it from splashing and making a mess.
2. With the mixer still on low speed, knead the dough for four to five minutes, or until it is smooth and supple. The dough should be somewhat sticky but still smooth and have an elastic texture. (If it is much stiffer than this, mix in one to two tablespoons water. If it is much looser than this, mix in two to three tablespoons all-purpose flour).
3. Lightly oil a large bowl. Transfer the dough to the oiled bowl, cover with an oiled piece of plastic wrap or a damp lint-free cloth, and place in a draft-free, warm area for two to three hours. The dough should rise until it is double in bulk.
4. Once the dough has risen, flour your hands and the work surface and turn the dough out onto the work surface. Press the dough into an 8-inch square and fold the top edge of the square down to the center of the dough and press the seam firmly with your fingers. Now fold the right side of the square into the center and the left side into the center, and again press the seam firmly. Turn the dough over, seam-side down, and shape the dough with a tucking motion, so that it is about six inches square. Transfer the dough to the prepared baking sheet, generously flour the top of the dough, and then cover the dough loosely, but completely, with a damp lint-free cloth or piece of plastic wrap. Place in a warm area for another hour or so until the dough rises and gets puffy and pillowy. If making hot pockets, split the dough in half and follow directions for the hot pockets. Reserved dough can be wrapped tightly in plastic wrap and kept in the refrigerator for a few days. If you are baking all the focaccia as focaccia, read on.
5. Preheat the oven to 400° F and place a rack in the center of the oven. Sprinkle the baking sheet with cornmeal and set aside.
6. When the dough is ready, remove the cloth or plastic wrap. Using all ten fingers, press and poke and elongate the dough three or four times along its length so that you press and stretch it into an almost-square log that is about 20 inches long, eight inches wide and about two inches tall. Bake for 35-45 minutes or until it is completely golden brown on the top and bottom. Lift the loaf and be sure the underside is brown before pulling it out of the oven, or you will end up with a soggy loaf. Let cool in the pan on a wire rack about 30 minutes, or until cool enough to handle, then cut into slices about 3⁄4-inch thick for sandwiches. The focaccia loaf will keep in a closed paper bag at room temperature for up to three days, or tightly wrapped in two layers of plastic wrap in the freezer for up to two weeks. If using day-old bread at room temperature, try toasting it for best flavor. If using frozen bread, thaw at room temperature for three to four hours, then refresh it in a 300° F oven for about five minutes.
HAM AND VERMONT CHEDDAR HOT POCKETS
Like the previous recipe for the Scallion Pancake, this also relies on a half-batch recipe of the Flour Focaccia dough. These savory treats make a nice alternative to a breakfast sandwich or are good paired with a creamy tomato soup for a warming simple supper.
Small handful cornmeal or all-purpose flour for sprinkling on the baking sheet
1⁄2 batch Flour Focaccia dough, or 1 pound store-bought pizza dough
8 ounces Black Forest ham, thinly sliced
8 ounces sharp Vermont Cheddar cheese, thinly sliced
Dijon mustard for serving
1. Preheat oven to 400° F and place a rack in the center of the oven. Sprinkle the baking sheet with cornmeal.
2. Shape the dough into a rough square, then divide it into five equal pieces. Liberally flour both your work surface and the dough. Using the rolling pin, roll each piece into a thin oval, about four by eight inches.
3. Place one-fifth of the ham and Cheddar slices over half the oval, covering about two by four inches and leaving a 1⁄2inch border uncovered along the edge. Fold the oval in half lengthwise to cover the ham and cheese, then seal the edges by pressing them together and then pinching them shut. Do not fold over the edges or you’ll end up with a thick, crusty layer with no ham or cheese in it. Repeat with the remaining ingredients, making a total of five ham and cheese pockets.
4. Place the pockets on a baking sheet about two inches apart. Bake for 20-25 minutes, or until the pockets are golden brown. Remove from the oven and let the pockets cool on the baking sheet or on a wire rack for about ten minutes before serving.
Serve with Dijon mustard on the side.