Hazelnut-Raspberry Rugelach
Caroline R. Stanton
Caroline R. Stanton
Half of the joy of baking comes from mastering a new technique and creating something worthy of a pastry case. The other half comes from sharing these proud creations with friends, family and community members. This spring, baking became a way to share joy with and be close to my community six feet apart.
Having received Joanne Chang’s latest cookbook, “Pastry Love,” for Christmas last year, I dug into her latest recipes during the shelter-in-place order. Friends, colleagues and even the owner of my local corner store became the happy recipients of my baking ventures. I have long admired Chang’s cookbooks – I often return to her first book “Flour” for her focaccia and ginger molasses cookie recipes – but I also like to think that I gravitated toward “Pastry Love” during this time because she too believes that we find joy in baking when we share it with others.
In the introduction to “Pastry Love” Chang writes, “We are all looking for connection with others in this crazy, unpredictable world. Every time you bake for someone or share a recipe, you are sharing a part of yourself.”
As coronavirus shuttered businesses last spring, Chang was forced to reduce operations at her eight Flour bakeries across Boston.
“I miss seeing bakers in the bakeries. Our kitchens are too small so we had to centralize our baking to a large production kitchen where the team can socially distance. I know that people are looking for comfort and joy. It’s what we worked hard to provide pre-COVID and now more than ever we are craving that,” she said.

During this time, Chang decided to leverage social media as a way to stay connected to her community of amateur bakers.
“I’m hopeful that by sharing baking through our #flourlove bake-along series and my cookbooks people are able to create some of that comfort and joy themselves,” she said.
Each week Chang shares a step-bystep video for a recipe from “Pastry Love.” Bakers follow along at home and share their creations on Instagram using the hashtag #flourlove. For ease, you can order a kit of all the needed ingredients for each recipe from one of the Flour bakeries. Visit www.flourbakery.com/flourlove/ for more information.
In the introduction to “Pastry Love,” Chang describes her winding journey to become a pastry chef and later proprietor of one of the most popular bakery chains in Boston. Her fans have heard the story before. She shares some version of it in each introduction of her cookbooks. This story – where she trades in her job at a management-consulting firm in Boston for the position of prep cook, eventually finding her way to the pastry station – is Chang’s way of welcoming bakers with all ranges of expertise to her recipes.
“I always imagine my mom or your mom, i.e. someone who I know is not a baker (my mom) and someone who might be, but I’m not certain (your mom),” she said.
Chang’s recipes are notoriously clear. She holds zero assumptions that readers come to her books with prior knowledge of techniques. “Pastry Love” is Chang’s fifth cookbook.

“I’ve learned so much from readers who give me feedback on how a technique is explained or who ask questions needing more clarification. I've also learned that a picture is truly worth many, many words and I advocated for more and more pictures in my books to help guide readers. ‘Pastry Love’ has a pic with every recipe, I’m proud to say,” she said.
Despite her accolades (“Pastry Love” was recently nominated for a James Beard Award, and Chang herself won a Beard Award in 2016), she turns to her readers as a sign of success.
“I know this job is done well when people bake from the book and bake a lot. That’s why we write cookbooks – so that people can make what we make at home,” she said.
These recipes from “Pastry Love” will bring warmth and joy into your home this fall during these uncertain times. ///
Caroline Stanton grew up on Nantucket and spent summers during college baking in the Provisions kitchen under the tutelage of Amanda Lydon. She now lives in Oakland, Calif., where she is a teacher. She writes occasionally for Nantucket Today.

The Recipes
 APPLE-VANILLA POUND CAKE
Typically, one can feel the weight of the “pound” in a pound cake. But Chang’s version is surprisingly light. She achieves this by whipping the eggs and sugar into a yellow foam and then folding in the dry ingredients. The recipe calls for half a vanilla bean along with vanilla extract. Don’t leave out the vanilla bean. It creates a subtle depth in the vanilla flavor and looks pretty speckled across each cake slice.
-
1/2 cup (1 stick) unsalted butter
-
Seeds scraped from 1/2 a vanilla bean
-
3 tablespoons heavy cream
-
1/2 teaspoon pure vanilla extract
-
3 large eggs, at room temperature
-
3/4 cup superfine sugar
-
1-1/4 cups cake flour, sifted after measuring 1/2 teaspoon baking powder
-
1/4 teaspoon salt
-
1 medium Granny Smith apple, peeled, cored and thinly sliced
-
1 tablespoon confectioner’s sugar
-
Preheat the oven to 350 F. and place a rack in the center of the oven. Line a nine-by-five-inch loaf pan with parchment paper or butter and flour the pan. Set aside.
-
In a medium saucepan, melt the butter. Add the vanilla seeds and whisk in the cream and vanilla extract. Let the mixture cool to room temperature.
-
In a stand mixer fitted with a whisk attachment, whip the eggs and superfine sugar until thick and lemon-colored, 4 to 5 minutes on medium-high speed.
-
While the eggs and sugar are whipping, sift and stir together the cake flour, baking powder and salt. When the egg-sugar mixture is thick, add the flour mixture and gently fold it in by hand using a rubber spatula.
-
Scoop a few large spoonfuls of the batter into the butter mixture and stir to combine well. Once the butter mixture is lightened, add it to the batter and fold until completely combined.
-
Scoop the batter into the prepared loaf pan. Layer and shingle the apple slices across the top in two rows.
-
Bake for 50 to 60 minutes, rotating the pan midway through the baking time, until the cake peeking out around the apple on top is golden brown and firm when you press it in the middle, and a cake-tester inserted into the middle of the cake comes out clean.
-
Remove the cake from the oven and let cool in the pan on a wire rack until cool enough to handle, about 20 minutes, then remove it from the pan and sift a bit of confectioner’s sugar on top. Using a very sharp serrated knife, gently slice through the apple and cake and serve.
Pound cake can be stored in an air-tight container at room temperature for up to two days.
COUNTRY FETA PIES
Bring these to your next brunch affair when you really want to impress. They are simple, yet demonstrate a certain level of skill (i.e. making a good pie crust). These little pies have a nice balance of vegetables and cheese that make them filling, but not too much. The fraisage technique, which Chang uses for the pâte brisée in this recipe, yields a tender and flaky crust.
-
1 recipe Master Single-Crust Pâte Brisée (recipe follows)
-
1 cup whole-milk ricotta cheese
-
1 cup crumbled feta cheese
-
2 large eggs
-
2 cups packed baby-spinach leaves, roughly chopped
-
2 scallions, minced (about 1/4 cup)
-
1/4 teaspoon freshly-grated nutmeg
-
1/2 cup half-and-half
-
1/4 teaspoon kosher salt, plus more for the tomato
-
1/4 teaspoon freshly-ground black pepper, plus more for the tomato
-
1 medium tomato, sliced into eight 1/4-inchthick slices
-
Make the pâte brisée: Remove it from the refrigerator about 15 minutes before using it, to soften slightly.
-
Spray 8 cups of a 12-cup regular muffin tin with pan spray, or use a paper towel dipped in softened butter or oil to coat the cups. Generously flick flour over the work surface, place the pâte brisée on it, then flour the pâte brisée. You want enough flour so the pâte brisée does not stick to either the rolling pin or the work surface.
-
Use the rolling pin first to press the dough down into a flat disk, pressing the pin with an upand-down motion into the pâte brisée. Flour the pâte brisée again and roll it out into a rough circle about 1/4-inch thick and 15 inches across.
-
Cut circles out of the dough that are about an inch larger than the diameter of the muffin-tin cups and press them firmly into the prepared cups. You will need to pleat them inside the cups a bit to get them to fit. Smush all the scraps together and re-roll them, then cut more circles until you have lined all 8 muffin-tin cups. Place the lined tins in the refrigerator for at least 1 hour or up to 2 days. Wrap the tin lightly with plastic wrap if refrigerating it for more than a few hours.
-
Preheat the oven to 350 F. and place a rack in the center of the oven.
-
In a large bowl, combine the ricotta, feta and eggs. Stir them together with a wooden spoon until the eggs are completely mixed into the cheeses. Add the spinach, half-and-half, scallions, nutmeg, salt and pepper. Stir until all of the ingredients are well-mixed. Remove the muffin tins from the refrigerator. With a large spoon, fill the cups evenly with the cheese mixture, using it all up. The filling should come up all the way to the tops of the dough. Top each pie with 1 slice of tomato, to cover the top. (The tomato will shrink a bit when baked, so it’s OK if a slice is a little larger than the top of the cup. If it’s a lot larger, cut the slice in half or trim it to fit. Sprinkle the tomato slices with a pinch each of salt and pepper.
-
Bake the pies for 45 to 55 minutes, rotating the muffin tin midway through baking, until the pastry is golden brown, the bottoms are totally baked through (gently pop out a pastry from the tin to take a peek), and the centers of the pies are firm when you press them. Remove from the oven and let cool for 15 minutes.
Country feta pies are best served within an hour or so after baking. But you can store them, well wrapped in plastic, in the refrigerator for 1 day. Warm them up before serving by placing them in a 300 F. oven for 10 to 12 minutes.
MASTER SINGLE-CRUST PÂTE BRISÉE
-
1 cup all-purpose flour
-
2 teaspoons sugar
-
1/2 teaspoon kosher salt
-
9 tablespoons unsalted butter, cold
-
1 large egg yolk at room temperature
-
2 tablespoons whole milk
-
In a stand mixer fitted with a paddle attachment, paddle together the flour, sugar and salt for 10 to 15 seconds. Cut the butter into about 12 pieces and add it to the flour mixture. Paddle slowly until the flour is no longer bright white and the mixture holds together when you clump it, and there are still lumps of butter the size of pecans throughout, 30 to 45 seconds.
-
Whisk together the egg yolk and milk in a small bowl and add them all at once to the flourbutter mixture. Paddle very briefly, just until it barely comes together, about 30 seconds. It will look really shaggy and more like a mess than a dough.
-
Dump the dough out onto a clean work surface and gather it together into a tight mound. Using the heel of your hand, smear the dough, starting at the top of the mound and sliding your hand down the sides of the mound along the work surface until most of the butter chunks are smeared into the dough and the whole thing comes together. This technique is called fraisage and makes a very flaky pie dough.
-
Wrap the dough tightly with plastic wrap and press down to make a disk about 1 inch thick. Refrigerate for at least 1 hour before using.
-
The dough can be stored in the refrigerator for up to four days or in the freezer for up to 4 weeks. Wrap in another layer of plastic if storing for more than 1 day.
Serves 6 to 8.
HOMEMADE NUTELLA BABKA
 Whenever babka is mentioned, I cannot help but recall the “Seinfeld” episode where Jerry waits for hours in line for a chocolate babka, only to have the last one bought by the woman in front of him. This babka is worth such a wait.
-
1 recipe Master Brioche Dough (recipe follows) 1/4 cup blanched hazelnuts
-
Homemade Nutella (recipe follows)
-
1-1/2 ounces bittersweet or semisweet chocolate, finely chopped
-
Hazelnut Syrup (recipe follows)
-
Mix the brioche dough and let proof for 6 hours or up to overnight in the refrigerator as directed.
-
Preheat the oven to 350 F. and place a rack in the center of the oven. Place the nuts on a baking sheet and toast for 6 to 8 minutes, until light golden brown and fragrant. Break a few open to check. Remove from the oven (turn off the oven), let the nuts cool, then rough-chop them. Line two 9-by-5-inch loaf pans with parchment paper or butter them generously, and set them aside.
-
Make the Nutella.
-
Generously flick flour over the work surface. Divide the brioche dough in half and roll out one half into a rectangle about 20 inches wide from side to side and 12 inches long from top to bottom. Brush off any loose flour from the surface of the dough. Mix the Nutella vigorously with a spoon to soften and loosen it. Using an offset spatula, spread half the Nutella evenly over the dough. Sprinkle half the chopped nuts and half the chocolate evenly over the Nutella. Roll the dough tightly, starting from the top and rolling downward in a spiral like a jellyroll. Repeat with the other half of the brioche dough. Place the dough rolls on a flat plate or baking sheet in the freezer for 10 to 15 minutes. This will make twisting them together a bit easier to handle, and they’ll be less likely to fall apart.
-
Remove the dough rolls from the freezer. Cut one of the dough rolls lengthwise straight down the middle completely in half, exposing the layers. Place one cut half across the center of the other cut half, maxing an X shape. Twist the dough on either side of the center around each other, keeping the exposed cut sides of the dough visible, so that you have a long twisted braid of dough. Fold the dough braid in half like a horseshoe, give it a twist so the Nutella is now hidden inside, and place in a prepared loaf pan, tucking in any overhanging or loose dough. Repeat with the second dough roll. Cover both babkas with plastic wrap or lint-free towels and place in a warm area in the kitchen. Let the babkas proof and grow for 1-1/2 to 2 hours, until they are billowing and soft and full.
-
Make the hazelnut syrup.
-
Preheat the oven to 350 F. and place a rack in the center of the oven. Remove the plastic wrap or towels and bake the babkas for 35 to 40 minutes, rotating the pan and switching their positions midway through the baking time, until the babkas are medium golden brown and sound hollow when you thump them on the bottom.
-
Remove the babkas from the oven and while warm, brush them with the hazelnut syrup. Let cool in the pans on a wire rack.
Babka can be stored in a paper bag at room temperature for 1 day. You can also freeze it, well wrapped in plastic, for up to 2 weeks. Refresh in a 300 F. oven for about 10 minutes before serving.
MASTER BRIOCHE DOUGH
-
1-3/4 cups all-purpose flour 2 cups bread flour
-
2-1/4 teaspoons (1-1/4-ounce packet) active dry yeast
-
1/3 cup sugar
-
2-1/2 teaspoons kosher salt
-
4 large eggs, at room temperature
-
18 tablespoons unsalted butter, cut into 10 to 12 pieces, at room temperature
-
In a stand mixer fitted with a dough-hook attachment, combine the all-purpose flour, bread flour, yeast, sugar, salt, 1/2 cup cold water and the eggs. Mix on low speed until the ingredients have come together, 3 to 4 minutes. Scrape the bowl as necessary to make sure all the flour is incorporated into the wet ingredients. Mix on low for another 3 to 4 minutes once the dough has come together. It will be very stiff.
-
Add the butter to the dough piece by piece and continue mixing on low for about 10 minutes. The butter needs to mix completely into the dough, so stop the mixer occasionally to scrape the sides of the bowl and break up the dough with your hands if necessary to help the butter mix in.
-
Once the butter is completely incorporated into the dough, mix on medium for another 15 minutes, until the dough becomes sticky and soft and somewhat shiny. Turn the mixer up to mediumhigh and mix for about 1 minute. You should hear a slap-slap-slap sound as the dough hits the sides of the bowl. Test the dough by pulling at it. It should stretch a bit and have a little give. If it seems wet and loose and more like a batter than a dough, add a few tablespoons of either all-purpose or bread flour and mix until it comes together. If it breaks off into pieces when you pull at it, continue to mix it on medium for another 2 to 3 minutes, until it develops more strength and stretches when you grab it. When it’s ready you should be able to gather it all together and pick it up all as one piece.
-
Place the dough in a large bowl or plastic container and cover the top with plastic wrap pressed directly against the surface of the dough to prevent a skin from forming. Let the dough proof in the refrigerator for at least six hours or up to overnight. The dough is now ready to use.
HOMEMADE NUTELLA
-
1/2 cup blanched hazelnuts 1 cup heavy cream
-
6 ounces milk chocolate, finely chopped (about 1 cup)
-
3 ounces bittersweet or semisweet chocolate, finely chopped (about 1/2 cup)
-
1/4 teaspoon kosher salt
-
Preheat the oven to 350 F. and place a rack in the center of the oven. Place the hazelnuts on a baking sheet and toast for 8 to 10 minutes, until they are light golden brown and fragrant. break a few open to check. Remove from the oven and let cool.
-
In a small saucepan, combine the cream and hazelnuts. Bring the mixture to a boil over high heat. Reduce the heat to medium and simmer for 2 to 3 minutes. Place the milk and dark chocolates in a medium metal or heatproof glass bowl. Pour the hot cream and nuts over the chocolate and whisk until the chocolates are melted. Add the salt. Pour the mixture into a blender or food processor and blend until smooth. Transfer to a bowl or storage container and let cool to room temperature. It will thicken and become spreadable.
-
Nutella can be stored in an airtight container in the fridge for up to 3 weeks. Bring the Nutella to room temperature before using.
Makes about 2 cups.
HAZELNUT SYRUP
-
1/2 cup blanched hazelnuts
-
1/2 cup sugar
-
Preheat the oven to 350 F. and place a rack in the center of the oven. Place the hazelnuts on a baking sheet and toast for 8 to 10 minutes, until they are light golden brown and fragrant. Break a few open to check. Remove from the oven and let cool.
-
In a small saucepan, combine the sugar and hazelnuts with a 1/2 cup water. Bring to a boil, then reduce the heat to medium. Simmer for 2 to 3 minutes, until the sugar has dissolved and the hazelnuts have softened. Remove from the heat and let sit for 30 minutes.
-
Pour the mixture into a blender or food processor and blend until the nuts are completely ground into tiny pieces. Strain through a finemesh sieve, discarding the solids.
The syrup can be stored in an airtight container in the refrigerator for up to 2 months.
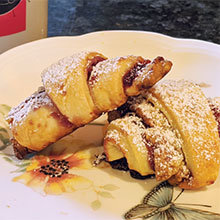
HAZELNUT-RASPBERRY RUGELACH
Cream cheese makes the dough light and tender. The process of rolling out the dough and folding it up like a letter (which Chang calls a trifold) three times over creates a flakiness in the dough when baked. Hazelnuts are an indulgent ingredient, but I found walnuts were an equally good substitute.
-
1 cup (2 sticks) unsalted butter, at room temperature
-
1 cup cream cheese, at room temperature 2 cups all-purpose flour
-
1/2 teaspoon kosher salt
-
Hazelnut Butter (recipe follows)
-
2/3 cup raspberry jam
-
2 tablespoons confectioner’s sugar
-
In a stand mixer fitted with a paddle attachment, mix the butter and cream cheese together on medium speed until well-blended, about 1 minute. Add the flour and salt and mix on low until the flour is completely mixed in. Remove the dough from the mixer and wrap it lightly in plastic wrap, or place it in a clean bowl and cover it with plastic wrap. Refrigerate for 1 hour.
-
Generously flick flour over the work surface. Remove the dough from the refrigerator, unwrap it, place it on the work surface and roll the dough into a rectangle about 24 inches wide from side to side and 18 inches long from top to bottom. The dough is a dream to work with, and you should have no trouble rolling it into a nice thin rectangle.
-
Divide the dough in thirds toward the center, then fold the right third of the dough on top of that, similar to folding a business letter. You will now have a rectangle that is about 8 inches wide and 18 inches long.
-
Rotate the dough rectangle counterclockwise 90 degrees (a quarter-turn) so it’s now 18 inches wide from side to side and 8 inches long from top to bottom. This is called giving the dough a trifold and turn. You are going to do this twice more for a total of three trifolds and turns.
-
Here we go with the second trifold and turn: Roll this out to a rectangle approximately 22 inches wide and 12 inches long. Again divide the dough in thirds by eye, fold the right third in toward the center, the left third on top of that, and then rotate the dough counterclockwise 90 degrees.
-
Roll the dough to approximately 18 inches wide and 12 inches long, then give the dough a trifold and turn so the dough packet is about nine by 12 inches. At this point the dough is done.
-
Cut the dough in half and wrap each half well in plastic. Place the dough in the refrigerator to rest for at least 1 hour or up to 3 days. You can also store the dough in the freezer for up to 2 weeks. Transfer it to the refrigerator to thaw the day before you plan to use it.
-
Preheat the oven to 350 F. and place a rack in the center of the oven. Make the hazelnut butter and set it aside. Line a baking sheet with parchment paper.
-
To shape the rugelach, generously flick flour over the work surface, then roll out one dough piece into a circle about 14 inches across. Trim the dough if needed to make it a circle. Spread half the hazelnut butter evenly over the whole circle, then spread half the jam on top of that. If the jam is too stiff to spread, stir it vigorously to loosen it up or microwave it to warm it slightly so it’s spreadable.
-
Using a sharp knife or a pizza cutter, cut the dough into 16 wedges by slicing the dough in half and then in quarters, then slicing each quarter in half and then in half again. Starting from the widest part of one wedge, roll it down toward the point. Place the shaped rugelach on the prepared baking sheet. Repeat with the rest of the dough wedges. Repeat with the second half of the dough, the remaining hazelnut butter and the remaining raspberry jam. At this point the shaped rugelach may be frozen on the baking sheet. Once frozen, transfer them to an airtight container and store in the freezer for up to 2 weeks. Bake directly from the freezer, adding up to 5 minutes to the baking time, as needed.
-
Bake for 35 to 40 minutes, rotating the baking sheet midway through the baking time, until the rugelach are medium golden brown throughout. The hazelnut butter might leak out a bit but that’s OK. You can cut off any excess when the rugelach cool.
-
Remove from the oven and let cool on the baking sheet or a wire rack. Dust with confectioner’s sugar before serving.
Rugelach can be stored in an airtight container at room temperature for up to 2 days.
HAZELNUT BUTTER
-
1-1/2 cups raw skin-on hazelnuts 1/3 cup honey
-
2 tablespoons unsalted butter 1/8 teaspoon kosher salt
-
Preheat the oven to 350 F. and place a rack in the center of the oven. Place the hazelnuts on a baking sheet and toast for 8 to 10 minutes, until they are light golden brown and fragrant. Break a few open to check.
-
Remove from the oven and let cool until just cool enough to handle.
-
Rub the nuts in a rough towel to loosen and remove any loose skins. Discard the skins.
-
Place the nuts, honey, butter and salt in a food processor or blender and blend on medium-high speed until the nuts are pulverized and resemble coarse peanut butter, about 2 minutes. Use immediately, before the oil separates from the mixture.
DOUBLE CHOCOLATE RYE COOKIES
Rye flour seems to be a particularly hip ingredient in baking right now. Previously relegated to the world of bread-making, it has been finding its way into recipes for sweeter pastries these days.
-
3/4 cup walnut halves
-
9 ounces bittersweet chocolate
-
6 ounces unsweetened chocolate 1/2 cup (1 stick) unsalted butter 1/2 teaspoon pure vanilla extract 1-1/2 cups sugar
-
4 large eggs, at room temperature 1/2 cup rye flour
-
1/2 teaspoon baking powder
-
1/4 teaspoon kosher salt
-
Preheat the oven to 350 F. and position a rack in the center of the oven. Place the walnuts on a baking sheet and toast for 8 to 10 minutes, until they start to smell fragrant and are lightly golden brown when you break one in half. Remove them from the oven and let cool. Roughly chop them and set aside.
-
Chop 5 ounces of the bittersweet chocolate and 4 ounces of the unsweetened chocolate into large chunks and place them with the butter in a metal or heatproof glass bowl. Set the bowl over a pot of simmering water and heat, stirring occasionally, until completely smooth. Remove from the heat, whisk in the vanilla, and let cool for about 20 minutes so it’s not piping hot.
-
In a stand mixer fitted with a whisk attachment, whisk together the sugar and eggs for about 5 minutes on medium-high speed, until light and thick and pale yellow. With the mixer on low, slowly add the chocolate-butter mixture.
-
Chop the remaining 4 ounces bittersweet chocolate into 1-inch chunks and shave the remaining 2 ounces unsweetened chocolate into fine shavings. In a medium bowl, stir together the rye flour, the chopped bittersweet chocolate, shaved unsweetened chocolate, baking powder, salt and toasted walnuts. Remove the bowl from the mixer, add the rye-flour mixture, and fold it in by hand until the dough is completely homogeneous.
-
For best results, scrape the dough into an airtight container and let it rest in the refrigerator for at least 3 to 4 hours or up to overnight before baking. The unbaked dough can be stored in the refrigerator for up to 1 week.
-
Preheat the oven to 350 F. and position a rack in the center of the oven. Line a baking sheet with parchment paper.
-
Drop the dough in 1/4-cup scoops onto the prepared baking sheet, spacing them about 2 inches apart. Bake for 10 to 12 minutes, rotating the baking sheet midway through the baking time, until the cookies are just starting to crack on the edges and the centers are soft but not liquidy when you press them.
SYRIAN NUTMEG CAKE
 This cake is a real crowd-pleaser. Brown sugar and nutmeg give the cake a warm, caramel flavor that contrasts with the light acidity of the crème fraîche frosting. Crème fraîche can be an expensive and sometimes hard-to-find ingredient, but I recently learned that it can be made easily at home if you have time to spare. For a DIY crème fraîche, heat 12 tablespoons of cultured buttermilk and 2 cups of heavy cream on the stove until tepid. Pour into a clean glass jar and let sit at room temperature for 8 to 24 hours. When the cream has thickened to your liking, place it in the refrigerator for another 24 hours before using.
-
1-3/4 cups firmly-packed light brown sugar 1 cup whole-wheat flour
-
1 cup all-purpose flour
-
1/2 cup (1 stick) unsalted butter
-
1 cup Greek yogurt
-
1 cup walnuts, roughly chopped
-
1 large egg at room temperature
-
1 teaspoon baking powder
-
1 teaspoon lightly-packed freshly-grated nutmeg
-
1/2 teaspoon baking soda
-
1/4 teaspoon kosher salt
-
1/2 cup heavy cream
-
1/2 cup crème fraîche
-
2 tablespoons confectioner’s sugar
-
1/4 teaspoon pure vanilla extract
-
Preheat the oven to 350 F. and place a rack in the center of the oven. Line the bottom of a 9-inch cake pan with a parchment-paper circle and set aside.
-
In a stand mixer fitted with a paddle attachment, combine the brown sugar, wholewheat flour, all-purpose flour and melted butter. Mix on low speed until the butter is totally incorporated and the mixture is sandy and crumbly.
-
Remove about 1 cup of the crumb mixture and press it over the bottom of the prepared pan. Press firmly to make an even layer over the bottom of the pan.
-
Add the yogurt, walnuts, egg, baking powder, nutmeg, baking soda and salt to the remaining crumbs. Mix on medium or by hand until the mixture is homogeneous, about 30 seconds using a mixer, about 1 minute by hand. Scrape the batter on top of the crumbs in the pan and spread it out evenly.
-
Bake for 1 hour to 1 hour and 10 minutes, rotating throughout the baking time, until cake springs back when you press it in the middle and a cake tester inserted into the middle of the cake comes out clean. Remove from the oven and let cool completely in the pan on a wire rack.
-
Carefully invert the cake onto a flat plate and lift off the pan. Peel off the parchment. Place a serving plate on top of the cake and turn it rightside up so the softer cake part is on top. Set aside.
-
In a stand mixer fitted with a whisk attachment, using a handheld electric mixer, or in a bowl using a whisk, whip the heavy cream, crème fraîche, confectioner’s sugar and vanilla together until fluffy and light. Spread the whipped cream evenly on top of the cake. Use the back of a spoon or a knife to make a circular pattern on the cream. Serve immediately.
Leftover cake can be stored in an airtight container in the refrigerator for up to 3 days. Be sure to remove the cake a few hours before serving so it can come to room temperature.


